Difference between revisions of "Help:Images"
| Line 2: | Line 2: | ||
== Uploading an File == | == Uploading an File == | ||
| − | Images must be '''uploaded''' to the LOTC Wiki before they can be used on wiki pages. Use the [[:Special:Upload|Upload file]] link under the Tools section of the sidebar. Select <code>Browse...</code>, choose the file you wish to upload, and select <code>Open</code>. | + | Images must be '''uploaded''' to the LOTC Wiki before they can be used on wiki pages. Use the [[:Special:Upload|Upload file]] link under the Tools section of the sidebar. Select <code>Browse...</code>, choose the file you wish to upload, and select <code>Open</code>. |
| + | Next you need to fill in the file description. The "filename" box should be automatically filled after the file is uploaded; you may change it if you'd like. Use the Summary field of the File description section to provide details about the image. Typically, the summary should contain a short description of the image and either the {{[[:Template:Art|art]]}} or {{[[Template:Cover|cover]]}} infobox template and any relevant categories. | ||
| + | ;Art Template {{t|art}} | ||
| + | : Looks like: <code><nowiki> {{art |#artist= |tracer= |modified= |book= |series= |source= |type= }}</nowiki></code>, where: | ||
| + | :* <code>#artist=</code> is followed by the artist's name, which should be a subpage of [[Coppermind:Artists]]. For official artists, which do not currently have Coppermind:Artists pages, use <code>artist=</code> and a regular link to their page. | ||
| + | :* <code>tracer=</code> is followed by the name of the person who traced the .svg file. | ||
| + | :* <code>modified=</code> is followed by the name of the person who modified this version of the file (e.g. by cropping). In this case <code>source</code> should link to the original file on the Coppermind. | ||
| + | :* <code>book=</code> is followed by the book that the artwork relates to or was taken from. | ||
| + | :* <code>series=</code> is followed by the series that the artwork relates to. This is important, as it categorizes the file. | ||
| + | :* <code>source=</code> is followed by a reference to the source of the artwork (usually a link to a page the image can be found on) | ||
| + | :* <code>type=</code> followed by any categories that the image fits into. | ||
| + | :* ''Note:'' <code>#artist=</code> and <code>source=</code> are required. Other parameters may be omitted if irrelevant. Each parameter should be written on a new line. | ||
| − | + | ;Cover template {{t|cover}} | |
| + | : If you're uploading a book cover, use the {{t|cover}} template instead. It has a number of parameters, which you can see on the template's page, but the necessary ones are: | ||
| + | :* <code>book=</code> followed by the book that the cover comes from. | ||
| + | :* <code>artist=</code> followed by the name (and, if they have a page here, the page) of the artist who created the cover art | ||
| + | :* <code>country=</code> followed by the country the cover was first used in | ||
| + | :* <code>source=</code> followed by a reference to the source of the artwork, as with the {{t|art}} template | ||
| − | + | Don't worry about getting this all right first time--the wiki staff will most definitely review all files uploaded and their respective information. If you don't understand how to use the {{t|art}} template, please at least ''add a brief description'' including the artist's name and a link to where you found the image. | |
| − | |||
| − | |||
| − | |||
| − | |||
| − | |||
| − | |||
| − | |||
| − | |||
| − | |||
| − | |||
| − | |||
| − | |||
| − | |||
| − | |||
| − | |||
| − | |||
== Inserting an image == | == Inserting an image == | ||
Revision as of 10:54, 7 May 2022
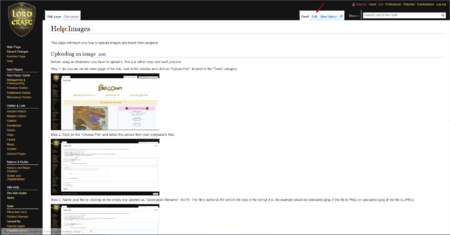
This page will teach you how to upload images and insert them into wiki pages. You must have permission from the artist before uploading an image! For more details, see Wikipedia's Help page on Images.
Uploading an File
Images must be uploaded to the LOTC Wiki before they can be used on wiki pages. Use the Upload file link under the Tools section of the sidebar. Select Browse..., choose the file you wish to upload, and select Open.
Next you need to fill in the file description. The "filename" box should be automatically filled after the file is uploaded; you may change it if you'd like. Use the Summary field of the File description section to provide details about the image. Typically, the summary should contain a short description of the image and either the {{art}} or {{cover}} infobox template and any relevant categories.
- Art Template
{{art}} - Looks like:
{{art |#artist= |tracer= |modified= |book= |series= |source= |type= }}, where:-
#artist=is followed by the artist's name, which should be a subpage of Coppermind:Artists. For official artists, which do not currently have Coppermind:Artists pages, useartist=and a regular link to their page. -
tracer=is followed by the name of the person who traced the .svg file. -
modified=is followed by the name of the person who modified this version of the file (e.g. by cropping). In this casesourceshould link to the original file on the Coppermind. -
book=is followed by the book that the artwork relates to or was taken from. -
series=is followed by the series that the artwork relates to. This is important, as it categorizes the file. -
source=is followed by a reference to the source of the artwork (usually a link to a page the image can be found on) -
type=followed by any categories that the image fits into. - Note:
#artist=andsource=are required. Other parameters may be omitted if irrelevant. Each parameter should be written on a new line.
-
- Cover template
{{cover}} - If you're uploading a book cover, use the
{{cover}}template instead. It has a number of parameters, which you can see on the template's page, but the necessary ones are:-
book=followed by the book that the cover comes from. -
artist=followed by the name (and, if they have a page here, the page) of the artist who created the cover art -
country=followed by the country the cover was first used in -
source=followed by a reference to the source of the artwork, as with the{{art}}template
-
Don't worry about getting this all right first time--the wiki staff will most definitely review all files uploaded and their respective information. If you don't understand how to use the {{art}} template, please at least add a brief description including the artist's name and a link to where you found the image.
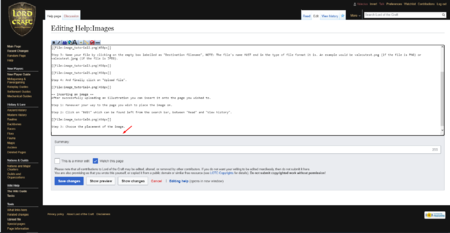
Inserting an image
After successfully uploading an illustration you can insert it onto the page you wished to.
Step 1: Maneuver your way to the page you wish to place the image on.
Step 2: Click on Edit which can be found left from the search bar, between Read and View history.
Step 3: Choose the placement of the image.
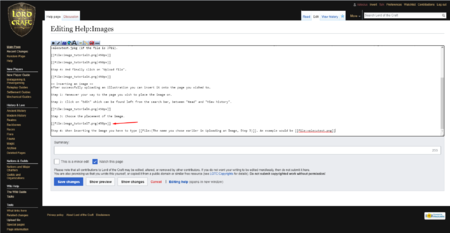
Step 4: When inserting the image you have to type [[File:(The name you chose earlier in Uploading an Image, Step 3)]]. An example would be [[File:valecutest.png]]


